
 Image 1 of 6
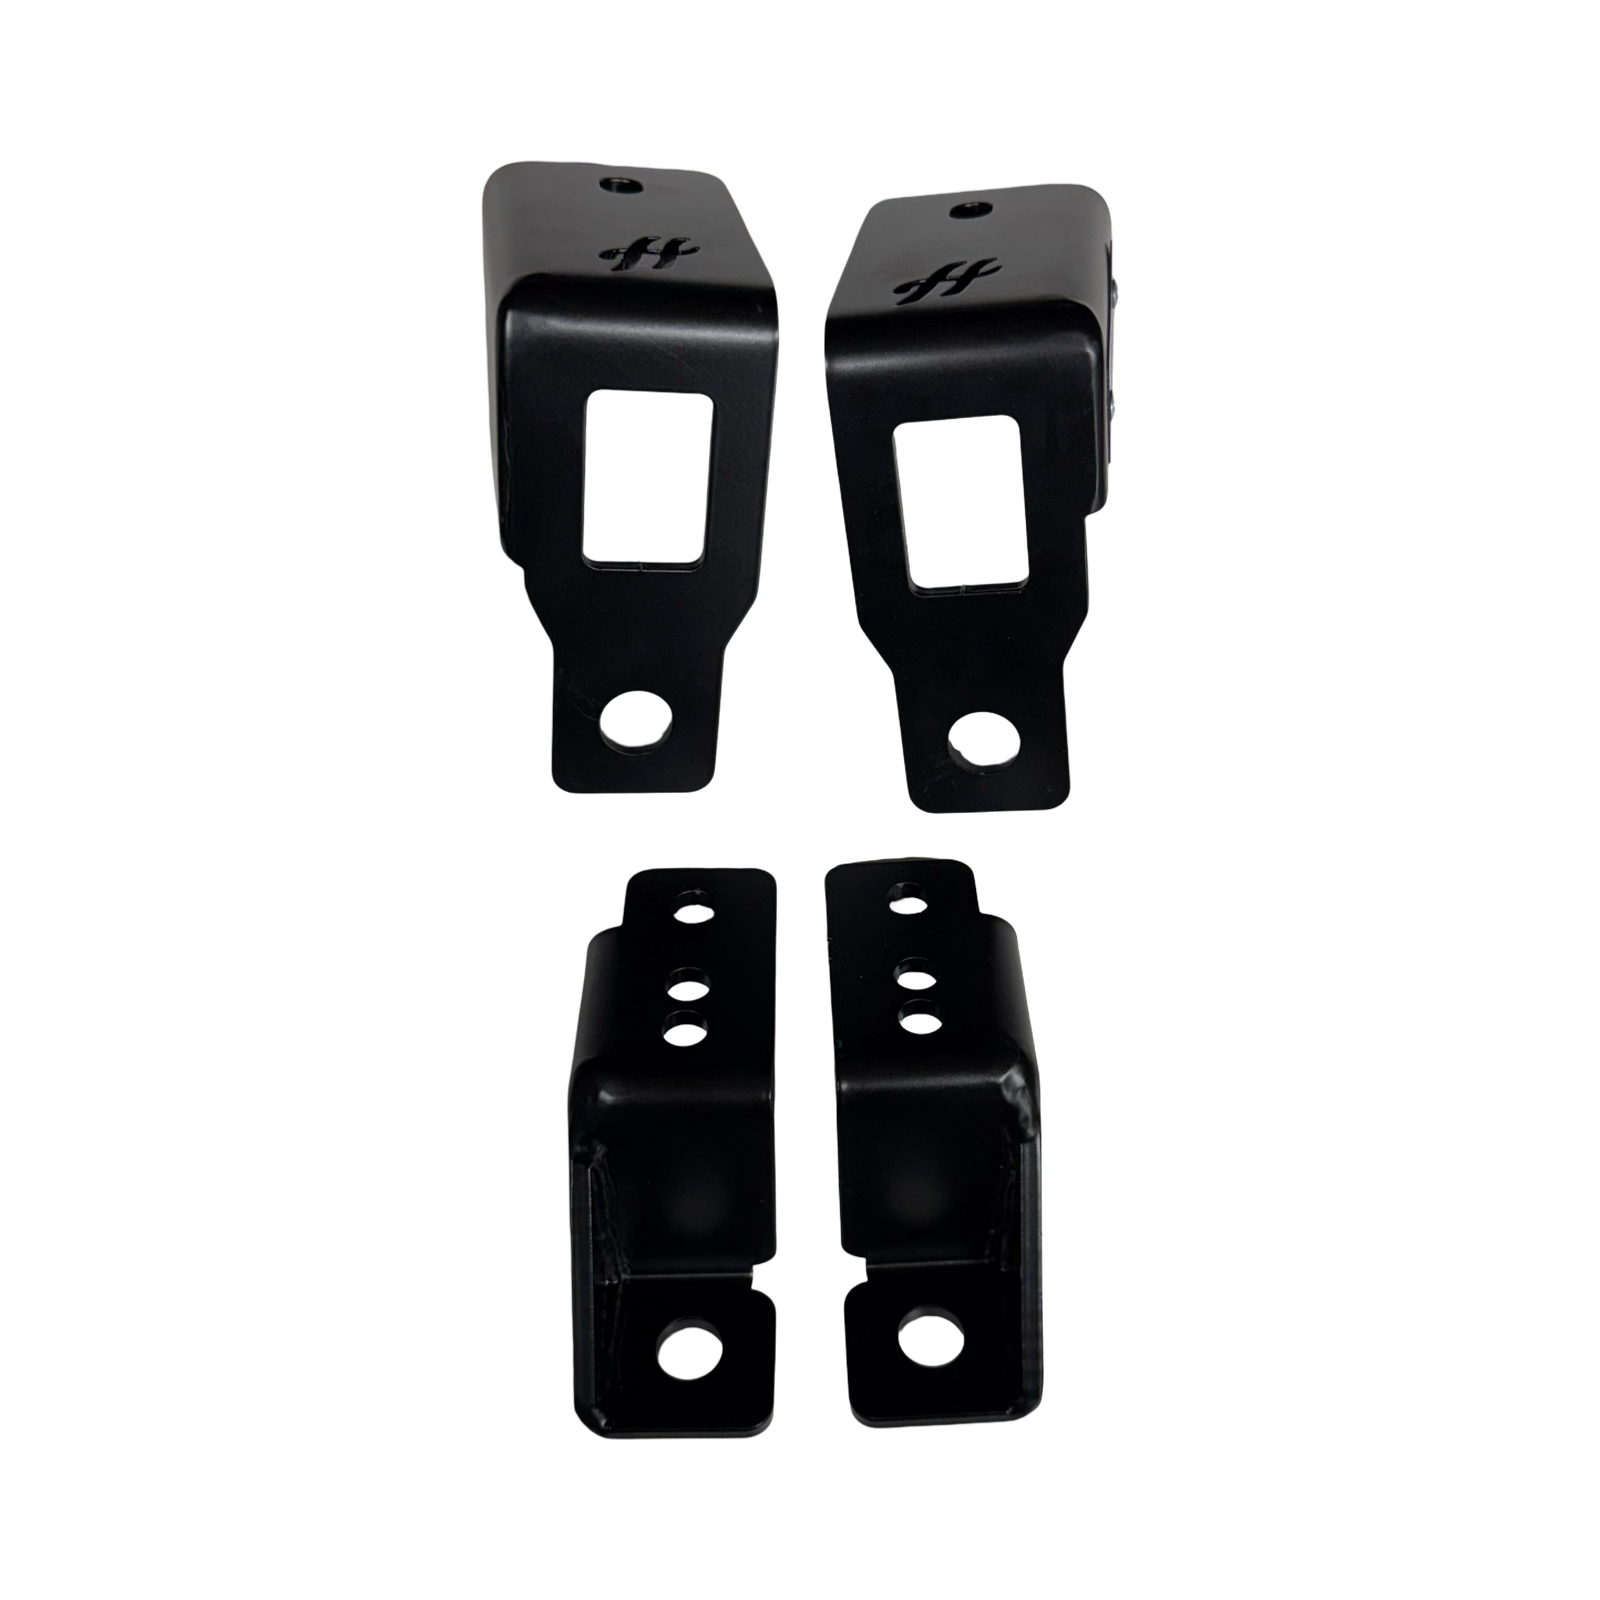 Image 2 of 6
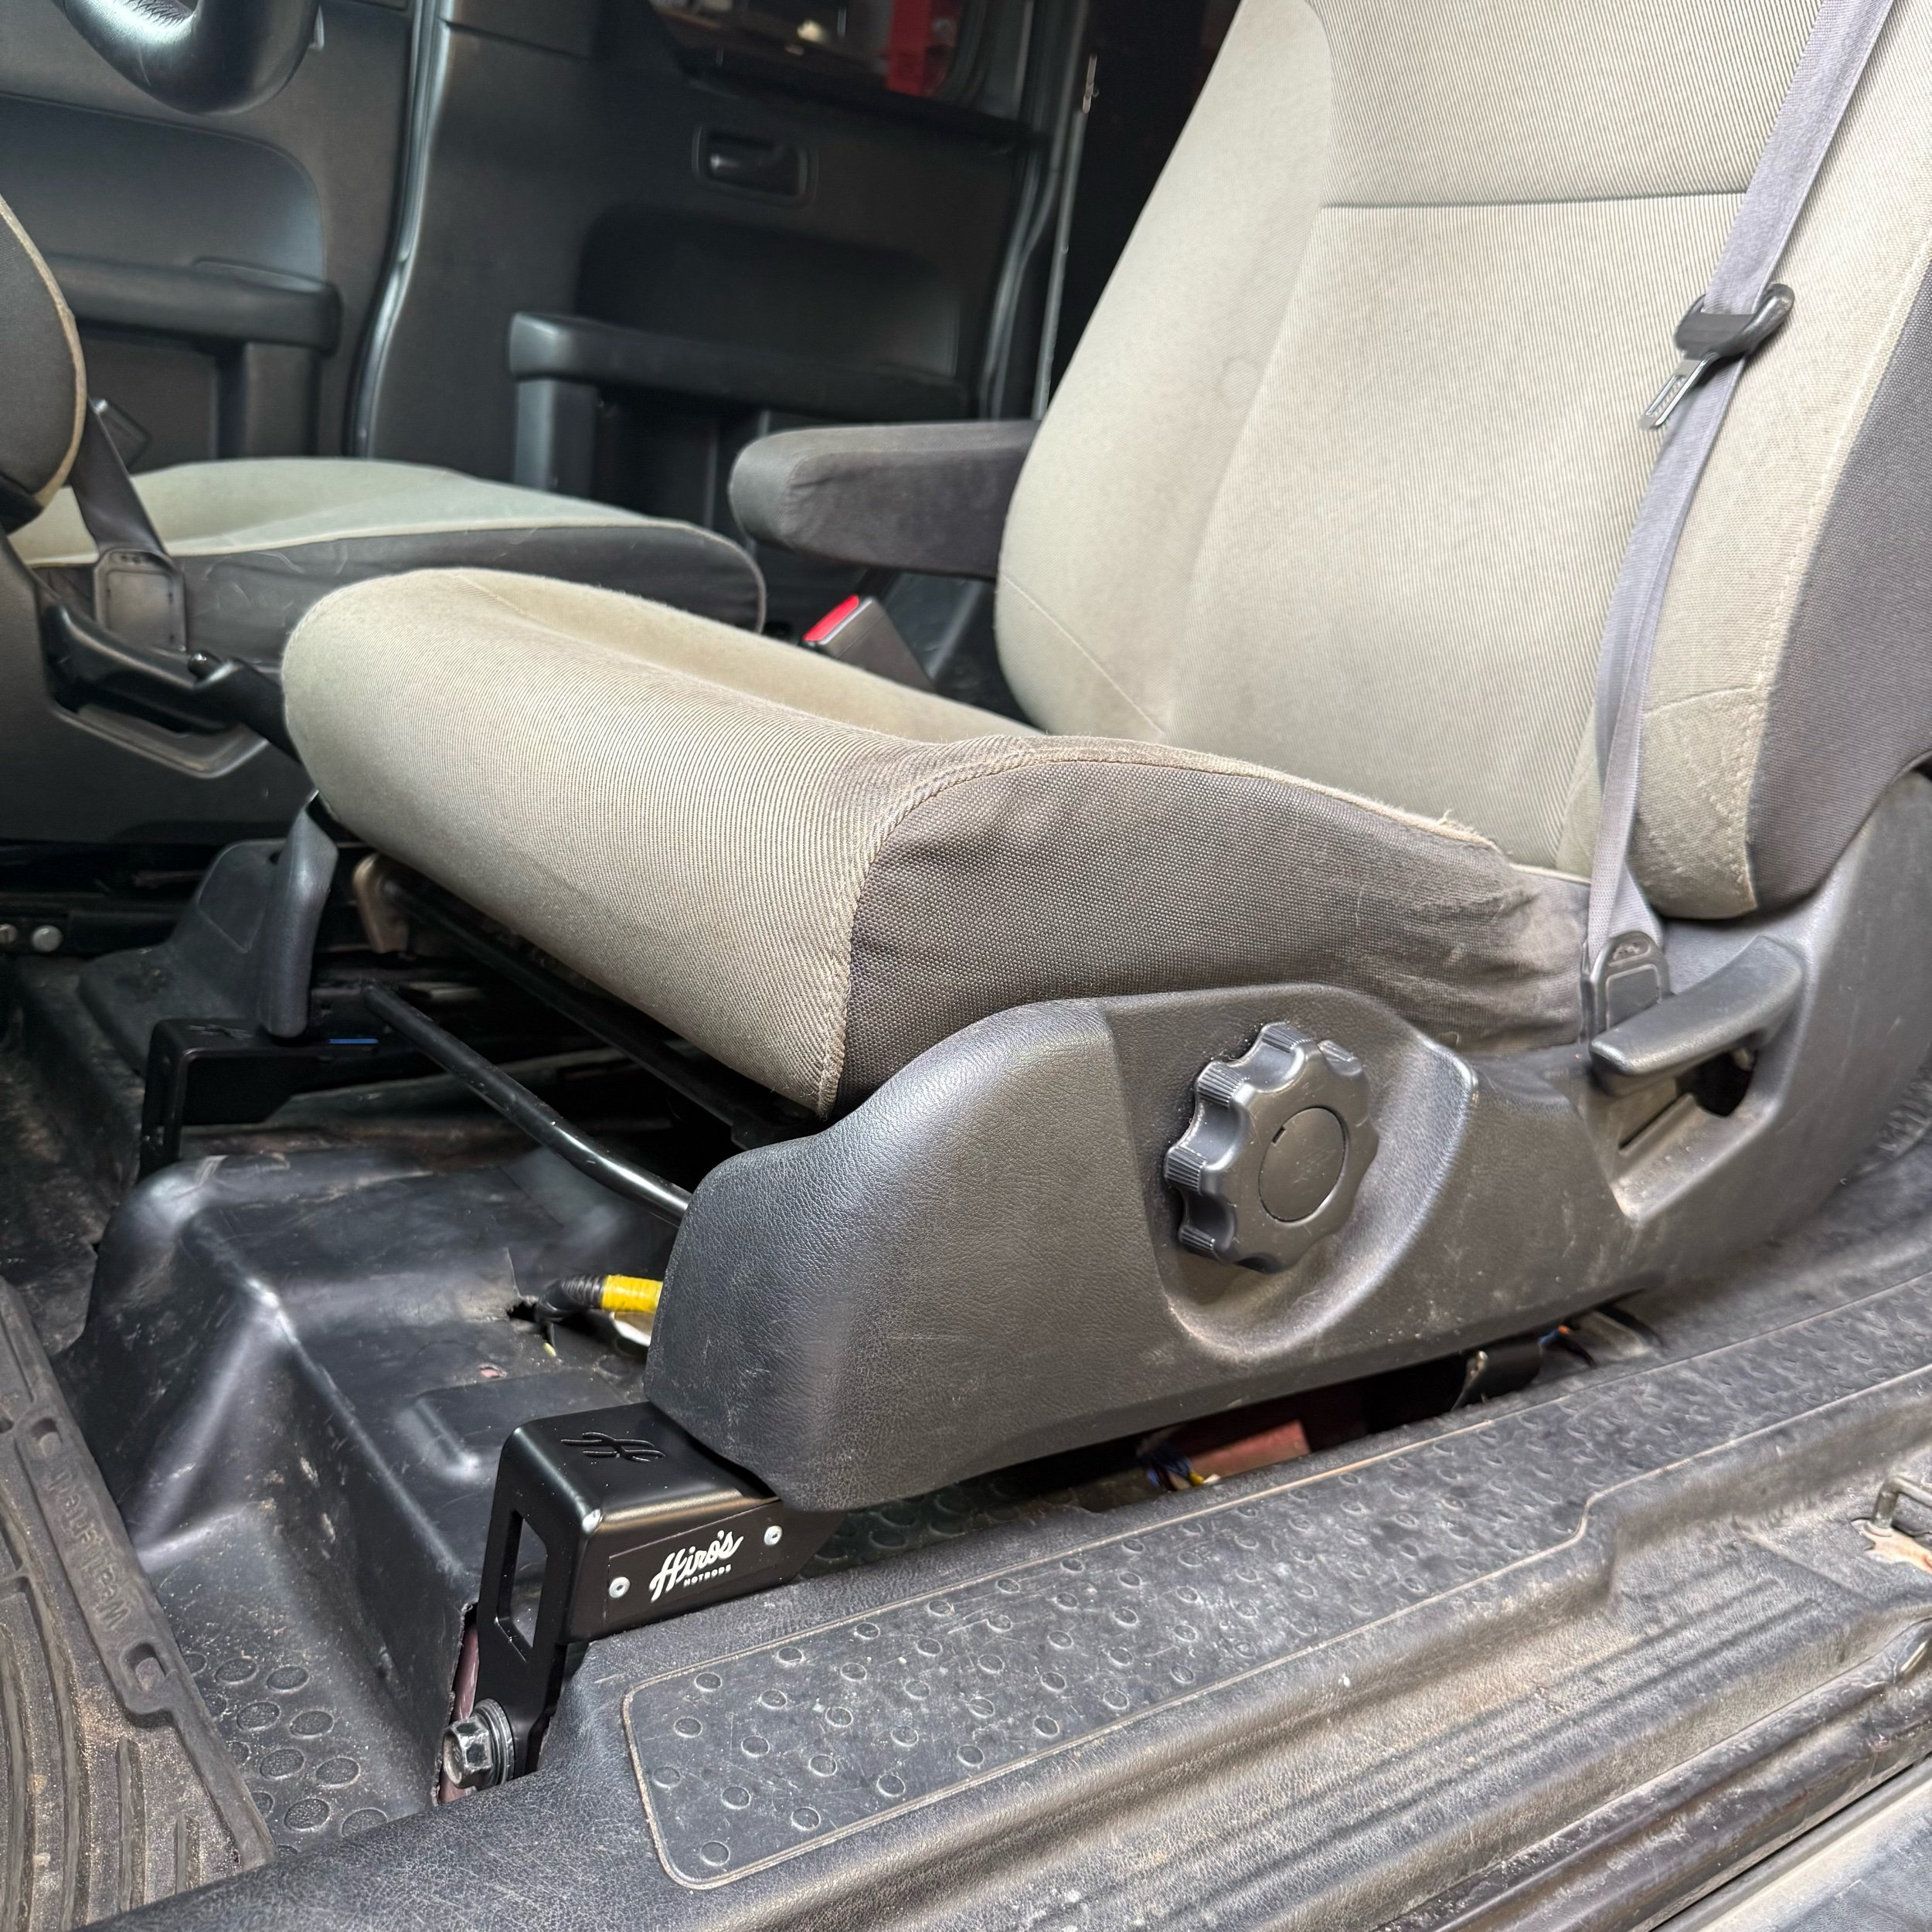 Image 3 of 6
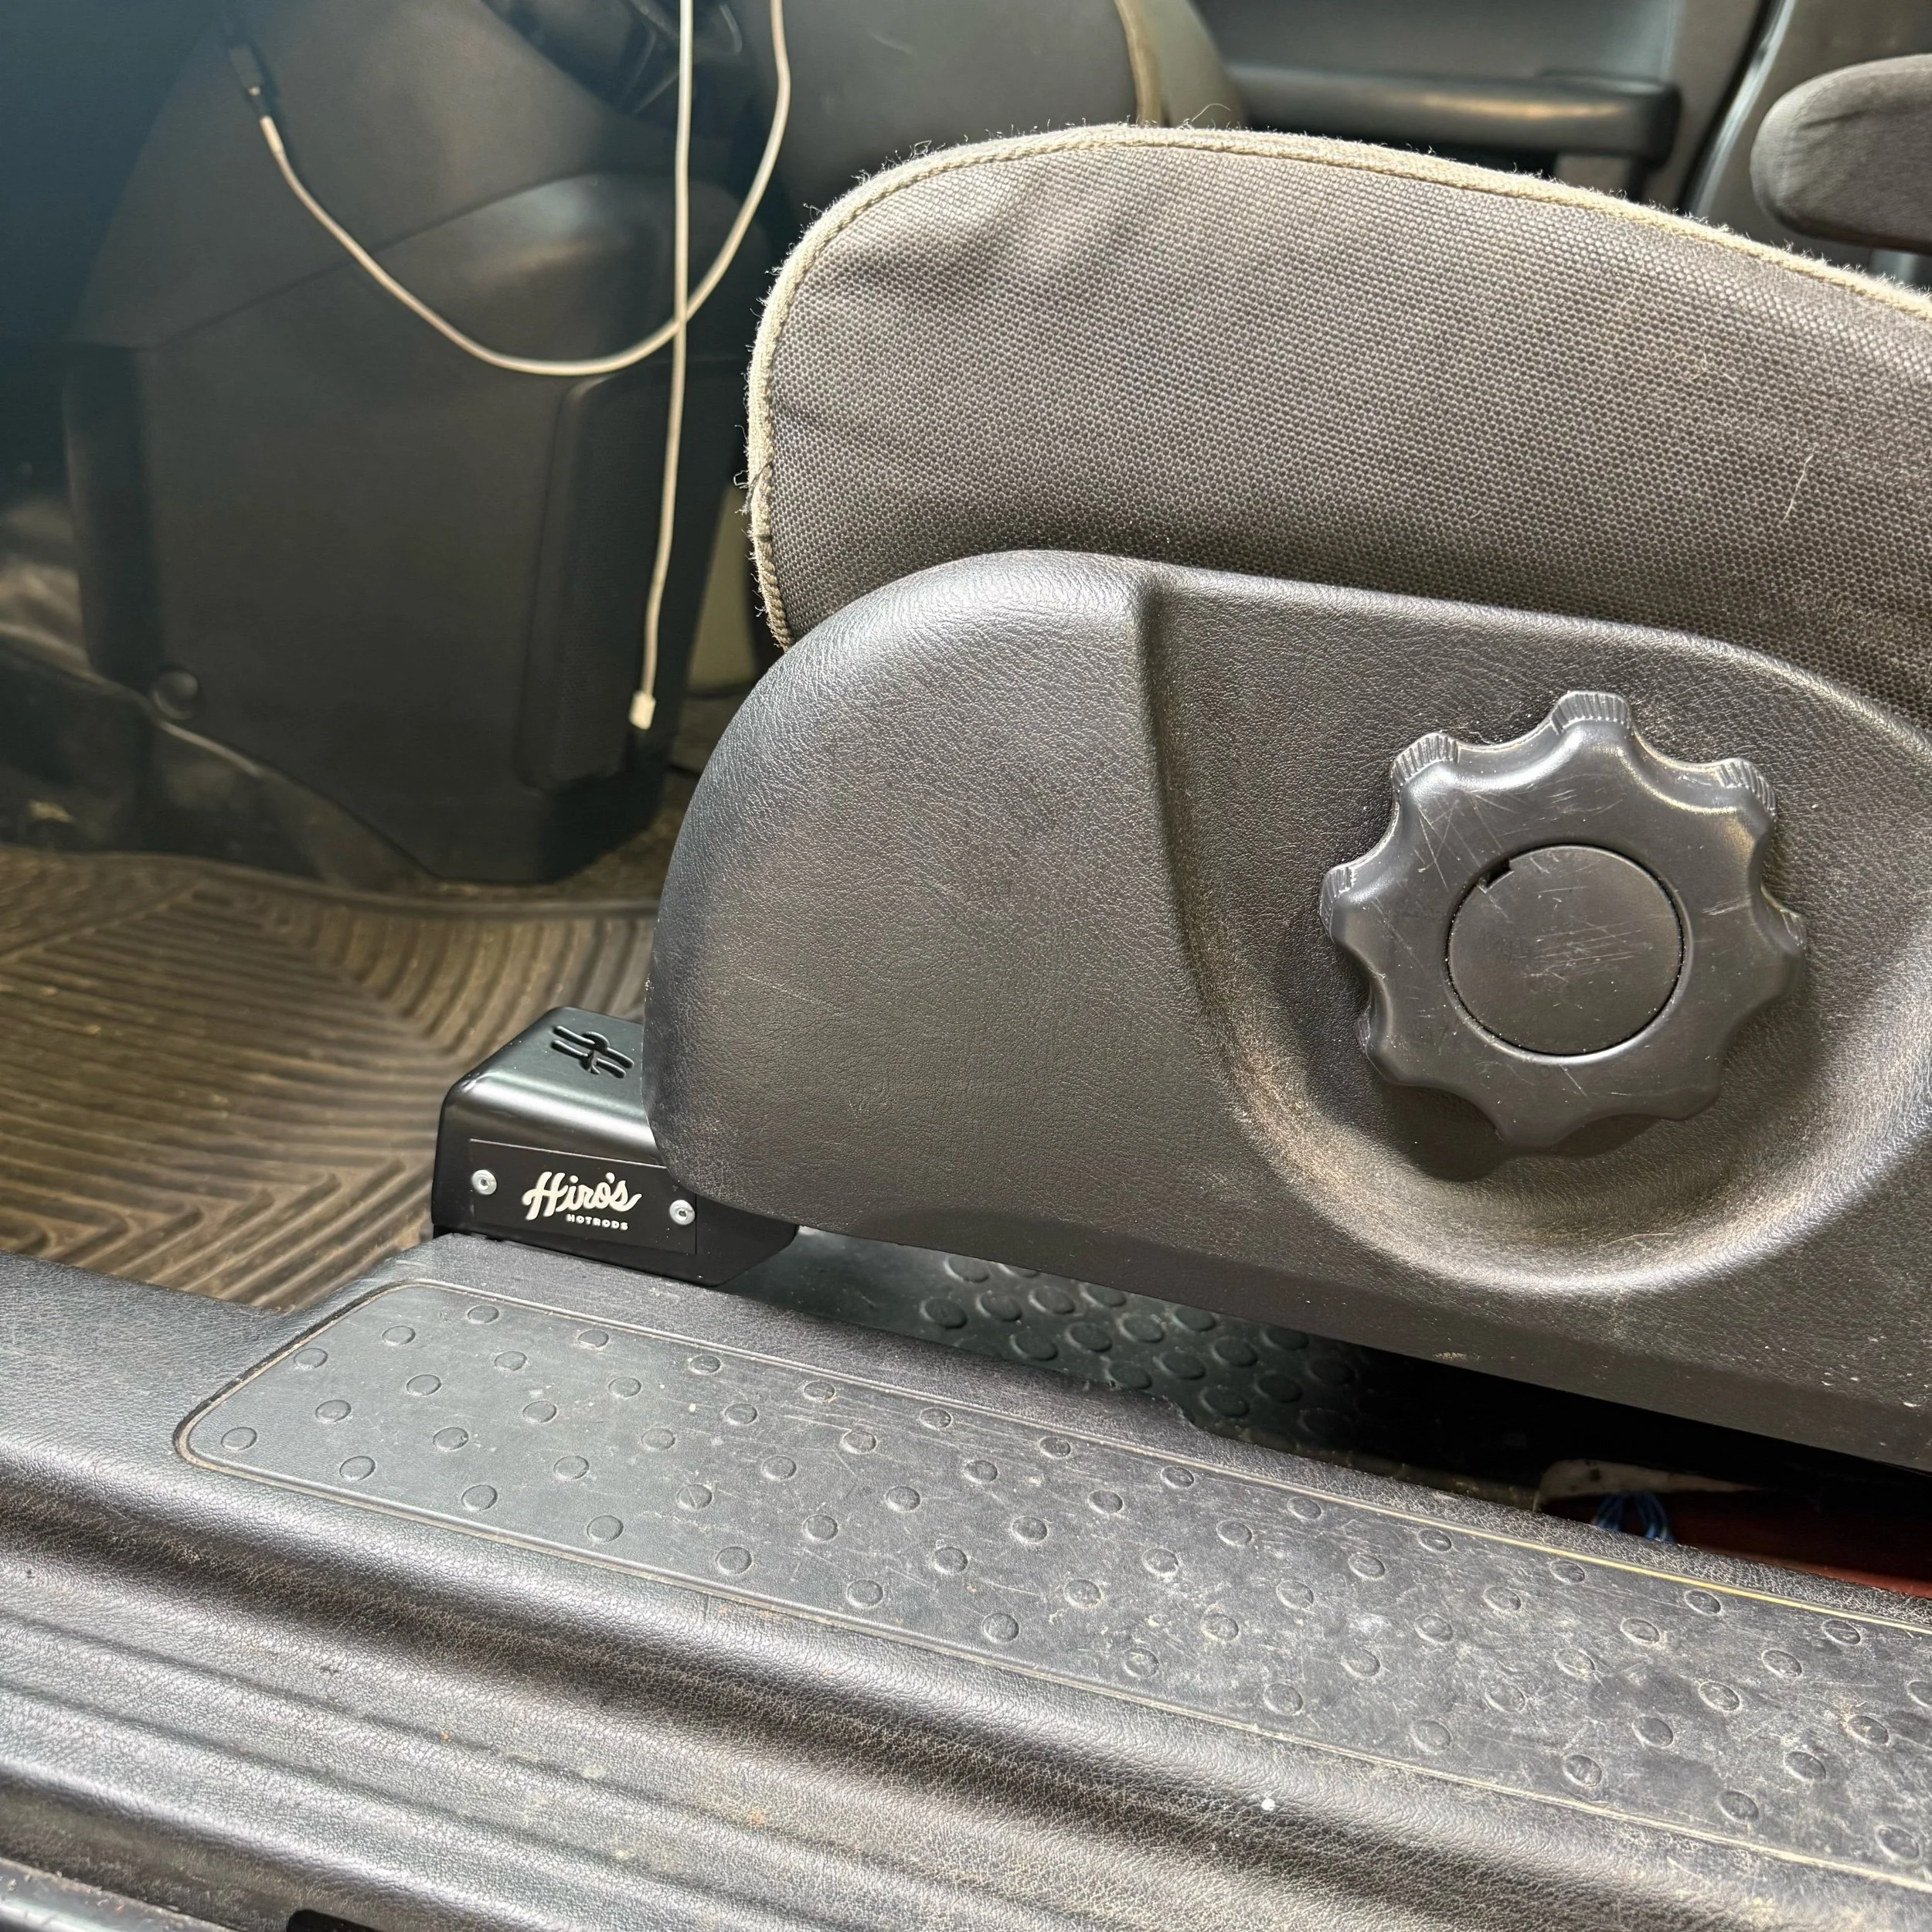 Image 4 of 6
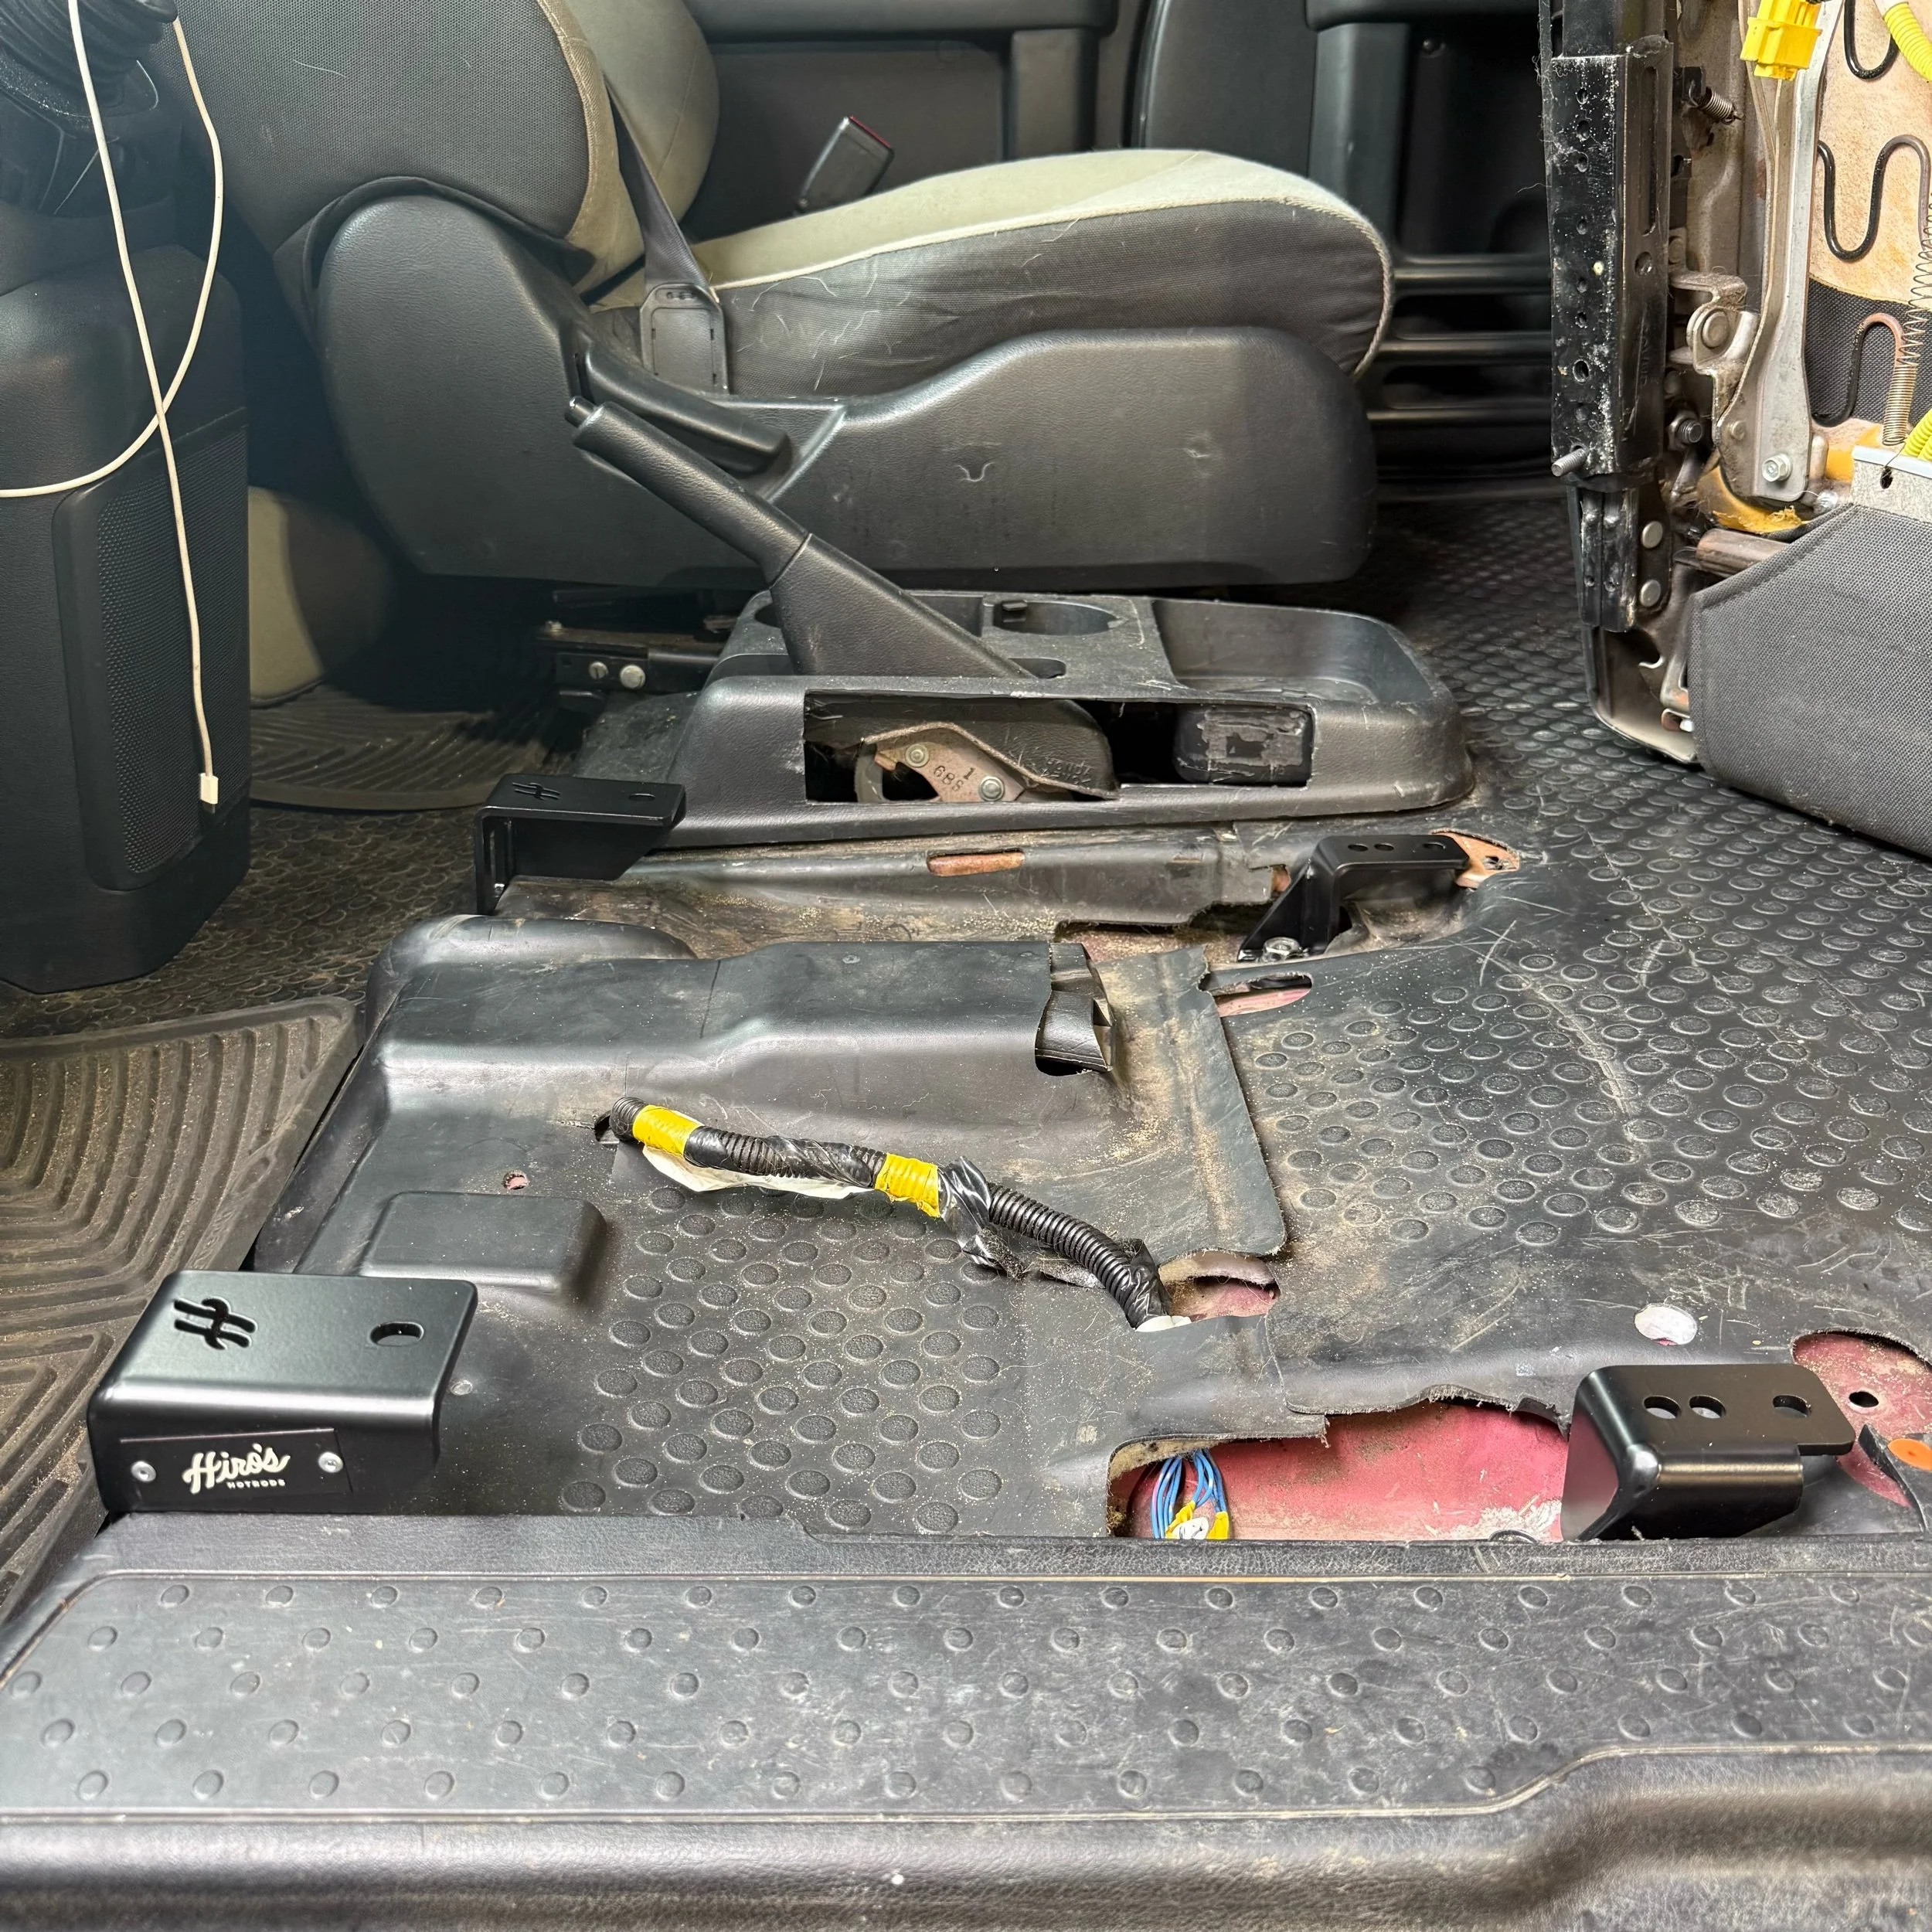 Image 5 of 6
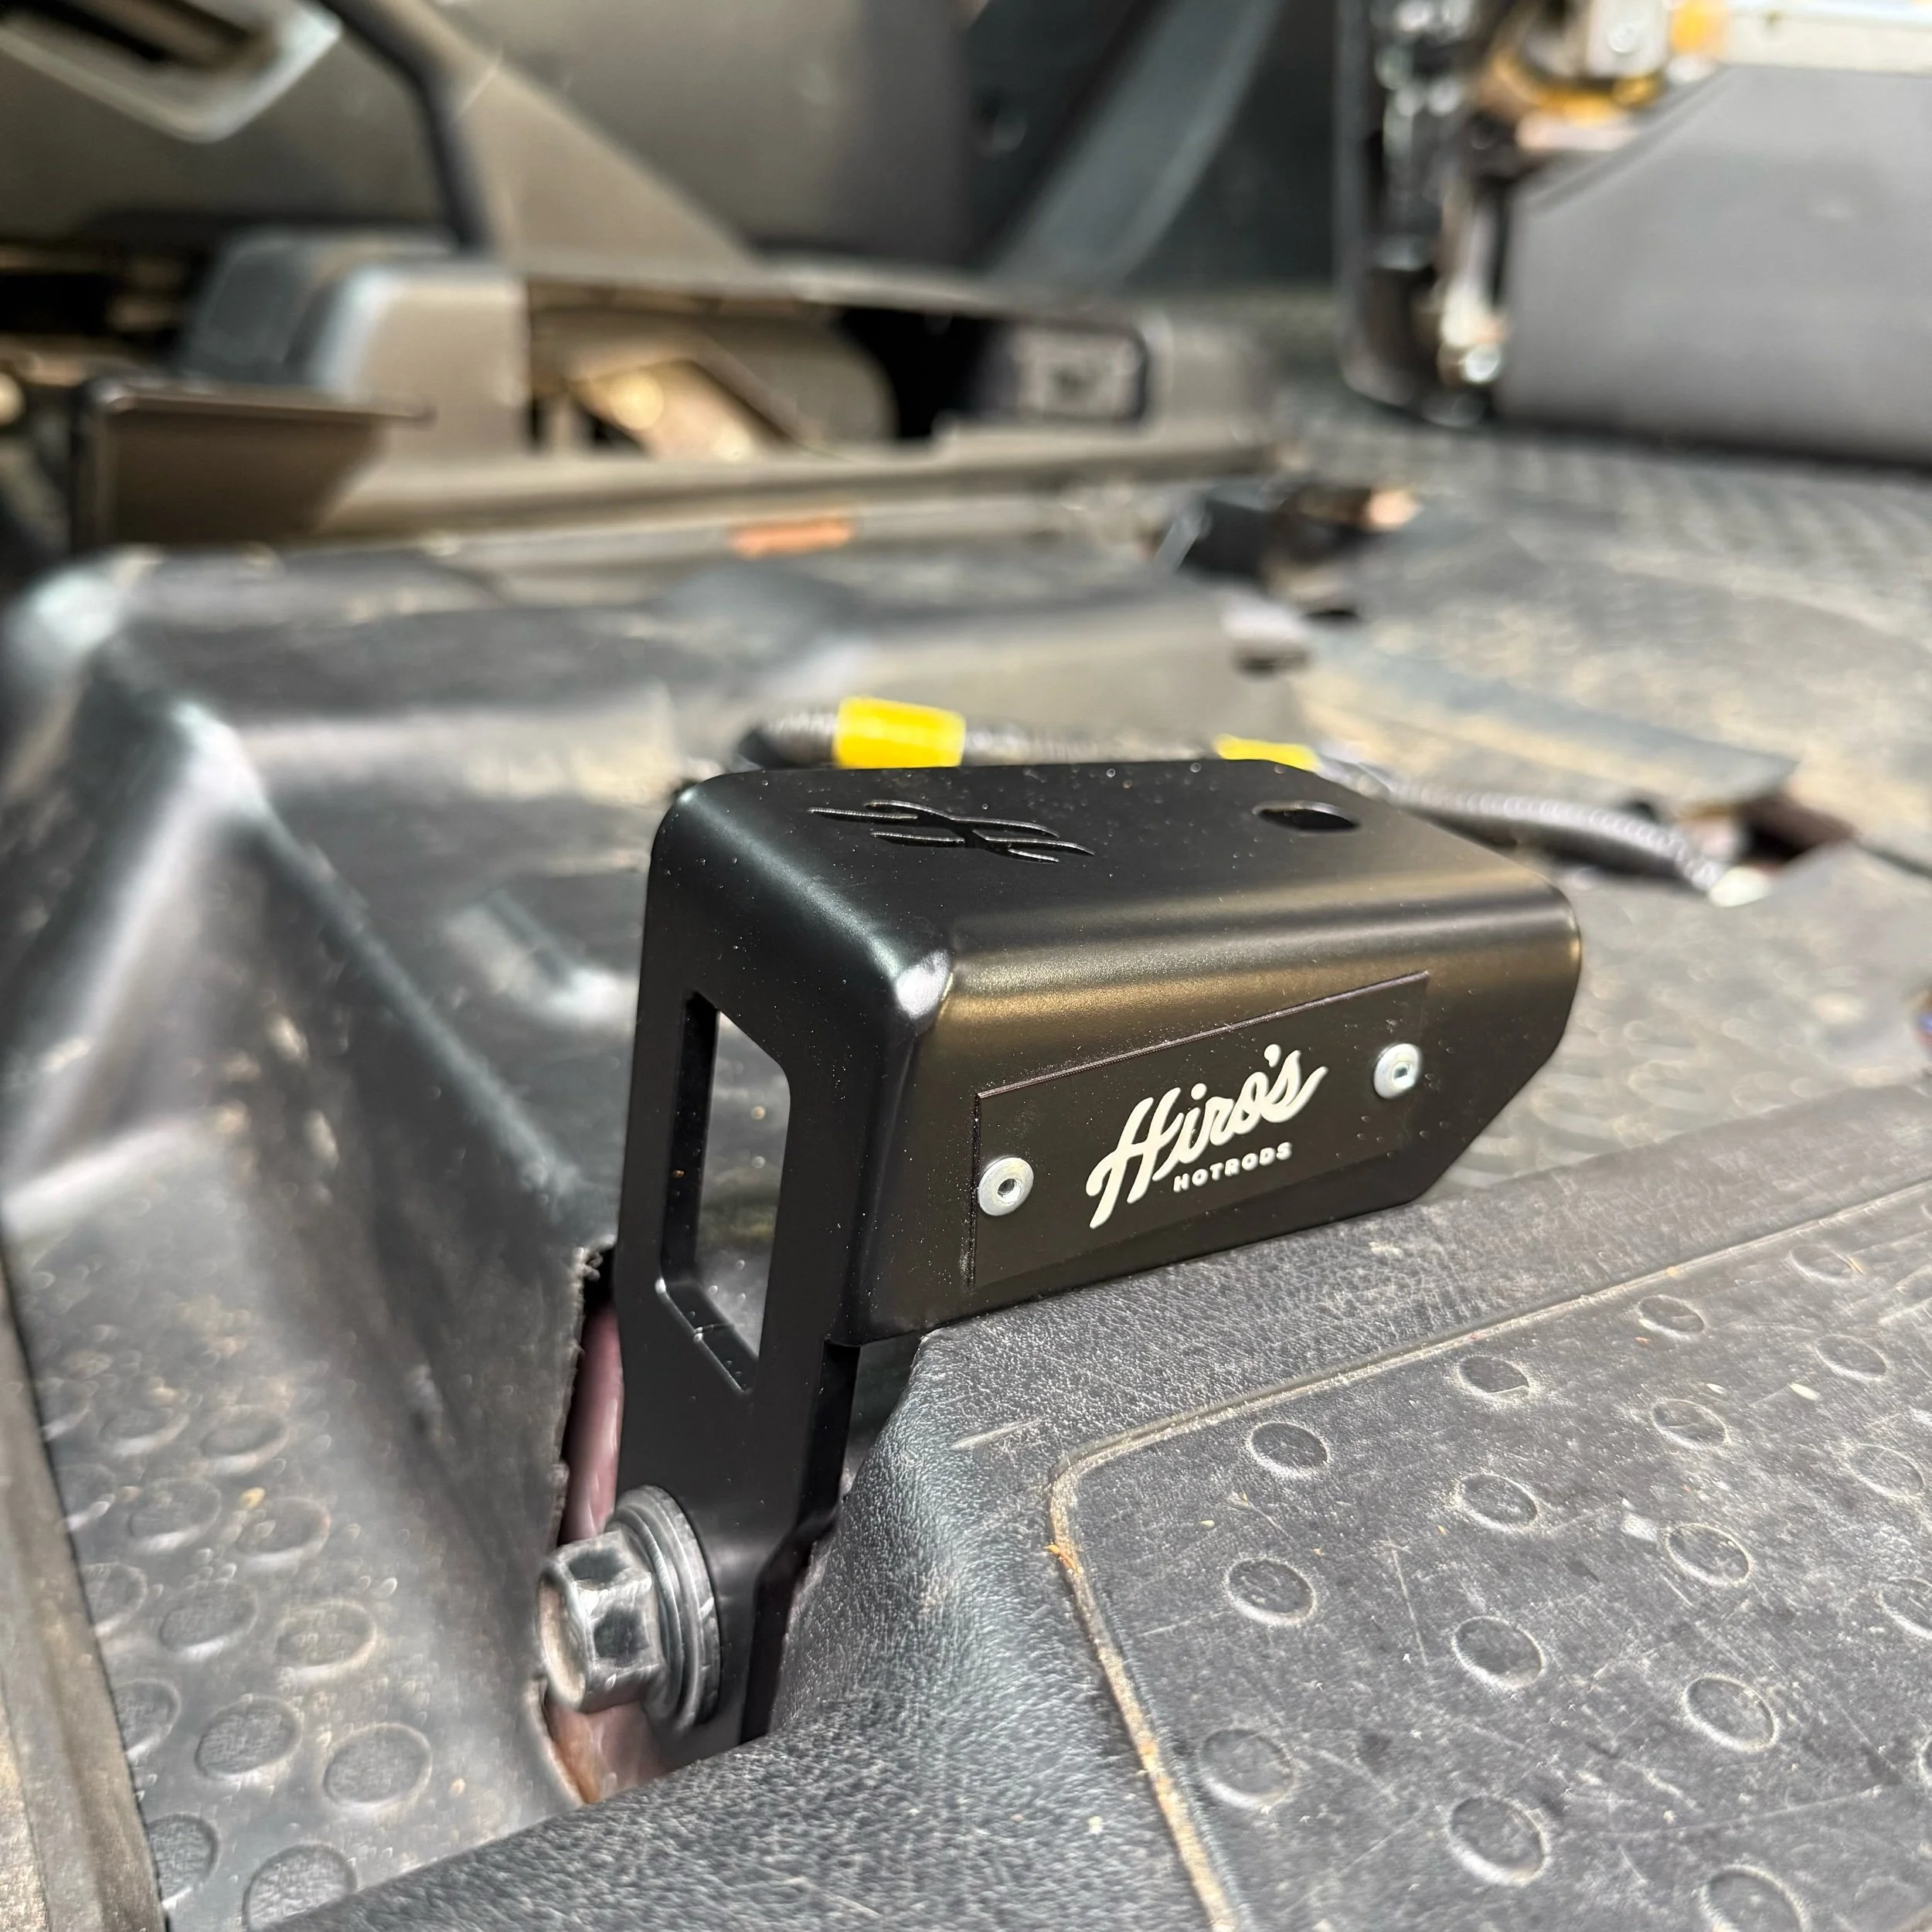 Image 6 of 6
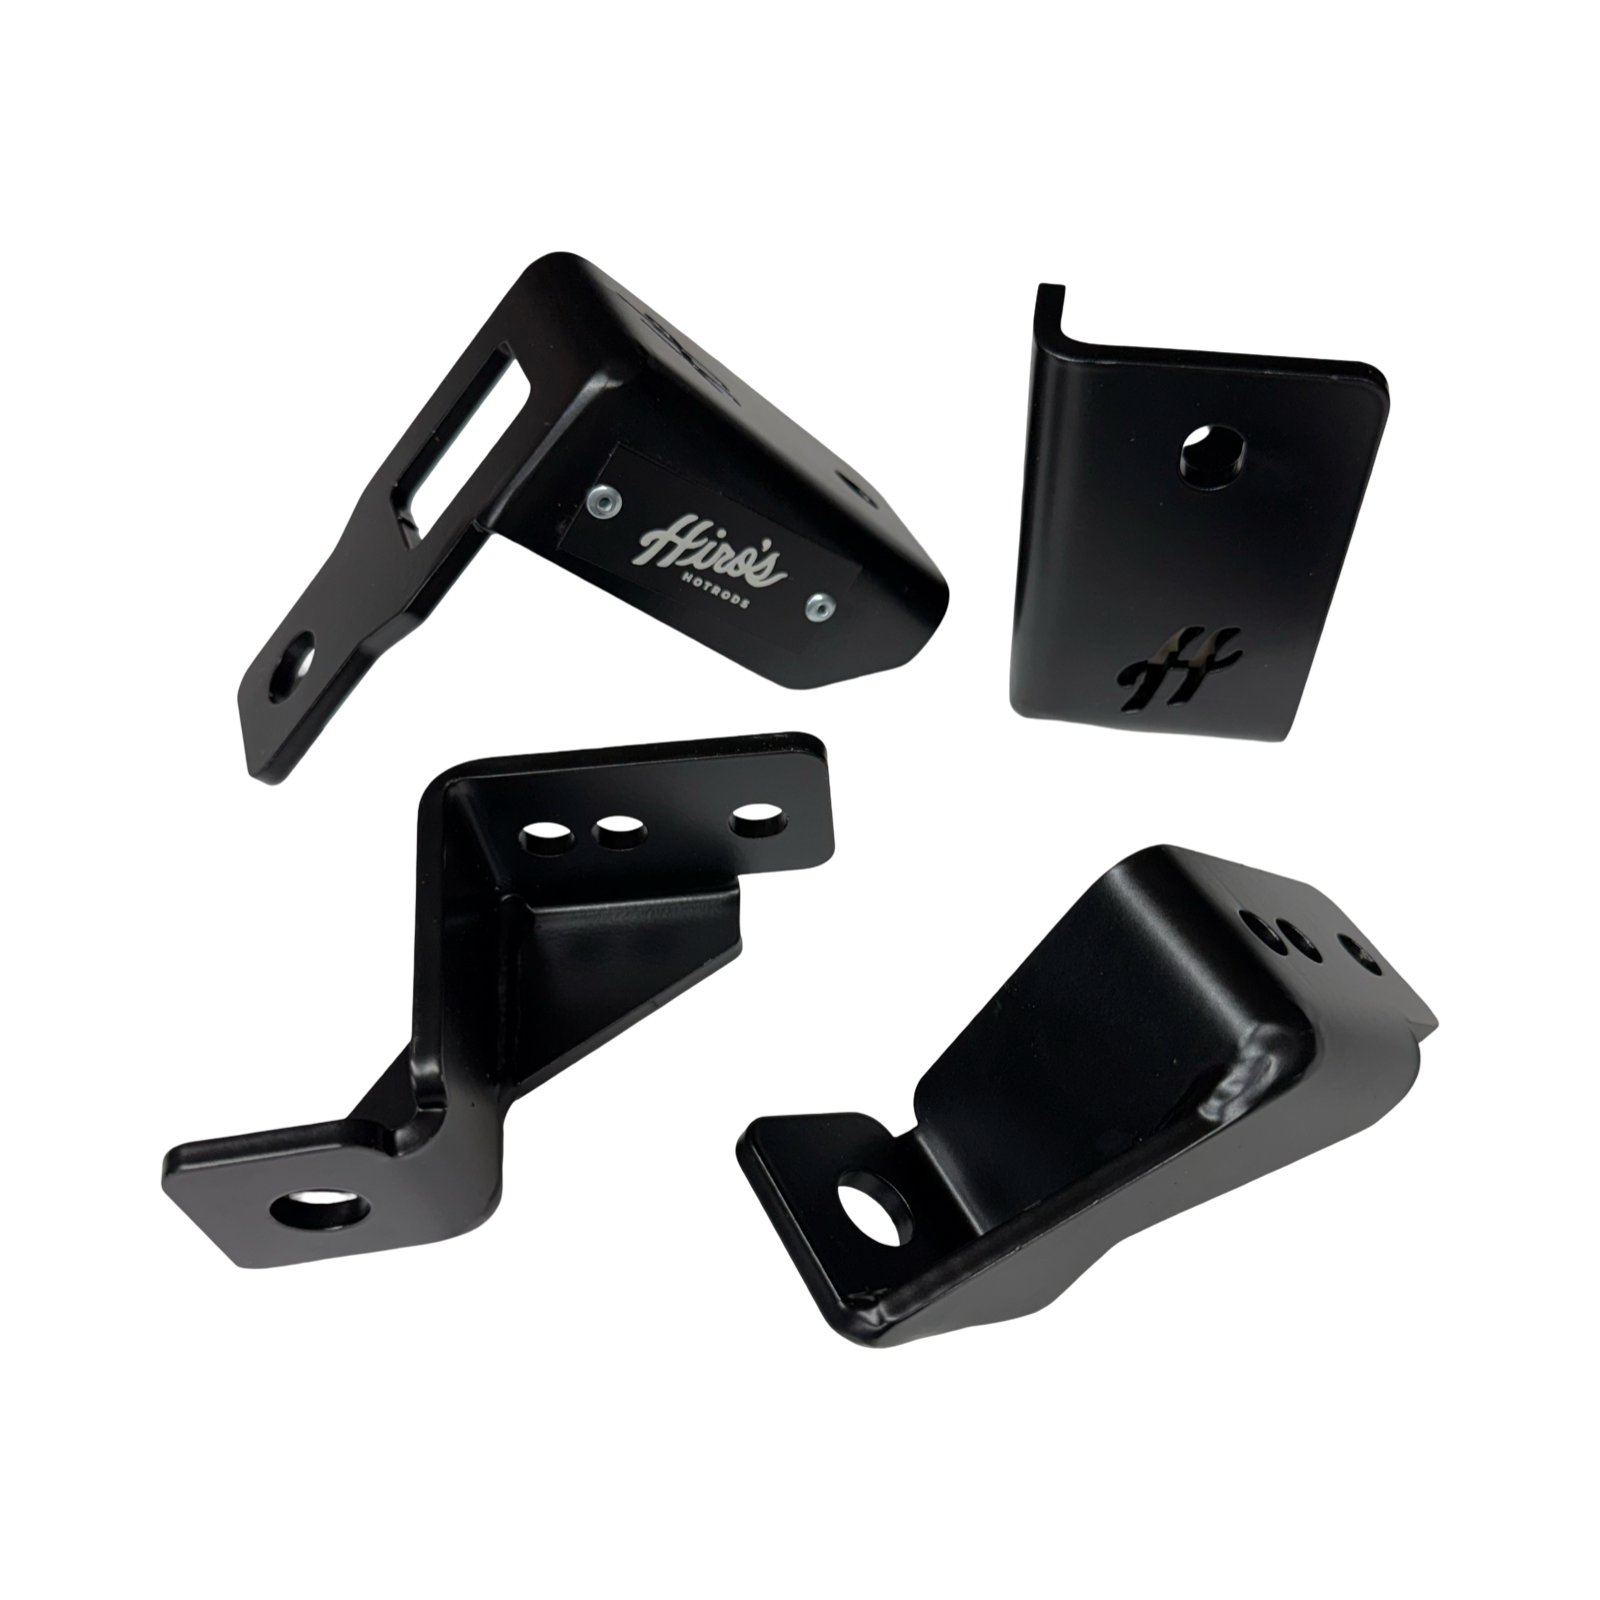
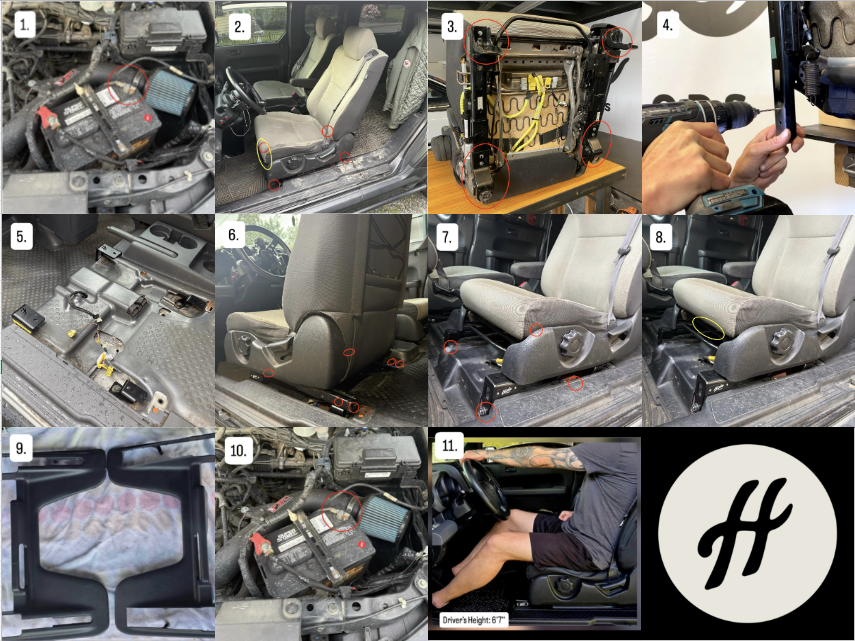
Here is a general step by step for installation of the BBB kit:
1. Disconnect negative battery terminal.
2. Remove driver seat. 4 bolts and the wire connectors under the front of the seat.
3. With the tools of your choice, remove the front and rear mounting brackets held on by factory rivets and welds. Remove and clean up so the new brackets will sit flush on the sliders.
4. An 8mm or 5/16th hole will need to be drilled for one of the bolts in the rear.
5. Once the sliders are cleared, it’s time to get the brackets into the car. Start by loosely installing the Hiro’s BBB brackets into the chassis. This will allow the sliders to settle in and remain square after you install the seat onto the brackets.
6. With the brackets loosely installed in the car, lower your seat onto them and use the 6 M8×20mm low socket cap bolts and serrated flange nuts to attach the sliders to the brackets. Make sure these are nice and tight.
7. Go back and snug all 4 seat mount bolts. 32-40 ft-lb. to be safe.
8. Reconnect all electrical connections.
9. Trim up the rear plastics around the back brackets and reinstall.
10. Attach your battery ground.
11. Enjoy that extra 4” of leg room!!
12. Hotrod the World
Any questions, please holler!
Hiroshotrods@gmail.com